

How To Angle Your Take Off: Going Left Or Right?
Our 4 Steps Of Angling The Take Off
Why angle the take off? What level is necessary? When and how do I angle?
Being able to angle the take-off consistently is a total game-changer for surfers. It provides considerable benefits that are crucial for both beginners and intermediates. Master angling your take-off and make the most of what a wave has to offer by following our 4 step process.
#1. Catching The Wave
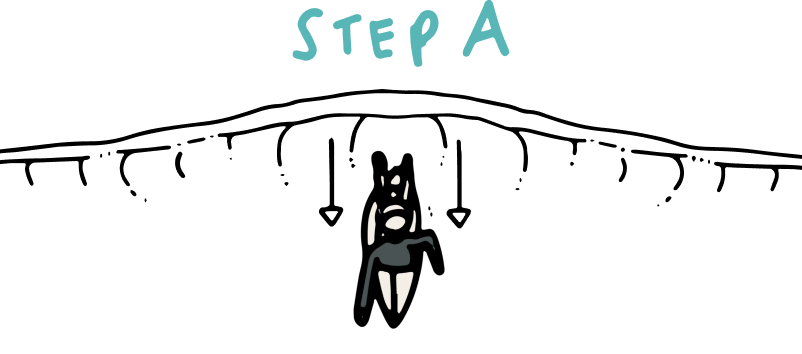
Angling your take off is all about technique and positioning. At a beginner level, it can be both frustrating and exciting all at the same time. It’s the first stage of learning to draw your line either right or left on the shoulder, and will significantly impact the quality and quantity of waves you surf on an average session. Believe it or not, the most common reasons we see surfers fail to angle their take off comes down not to the technique itself, but how they positioned themselves in the first place. In order to maximise your chances of both catching the wave and matching its speed, surfers must begin by paddling 100% perpendicular to the wave until the last 3 paddles. Put simply, this step cannot be overlooked. The more and the sooner you angle your take off, the harder it actually is to catch the wave. Positioning yourself correctly to complement your angle is key.
Access the full Angling The Take Off Online Course.
Angling the Take Off
The first time you glide with an unbroken wave will truly make you fall in love with surfing.
Course Content
🎥 Video Tutorials
Know where you’re going. It’s easier to go left or right when you decide right from the start where you want to go. If you want to increase your chances of a successful and enjoyable ride on the waves face, knowing what direction you’re going before getting to your feet is essential. You can then position yourself better and read the wave’s shoulder accordingly.
Tip: Only start angling your take off when you are certain that you are on the wave.
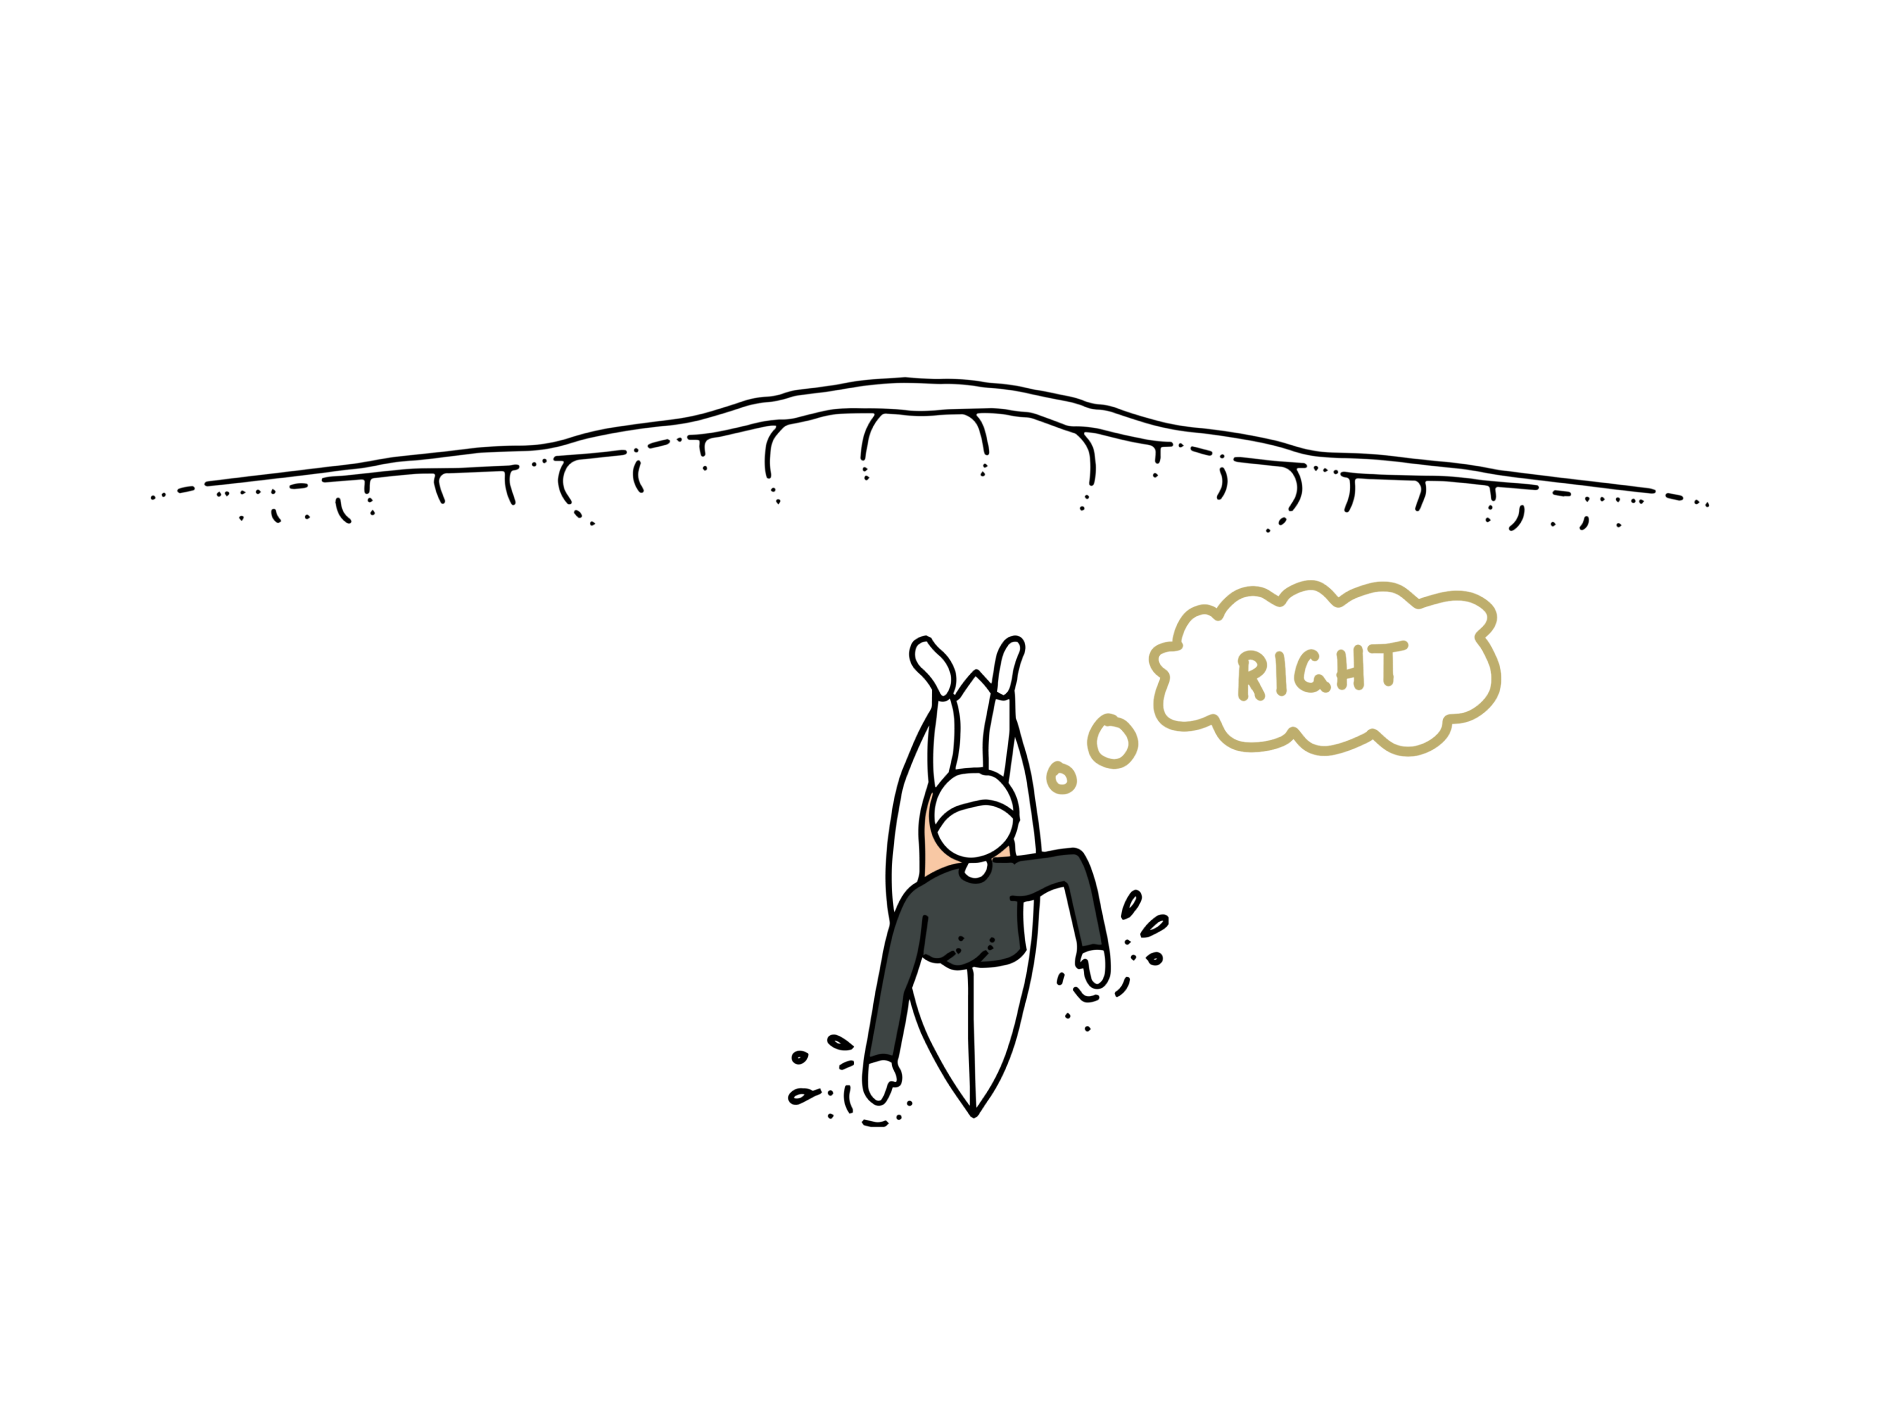
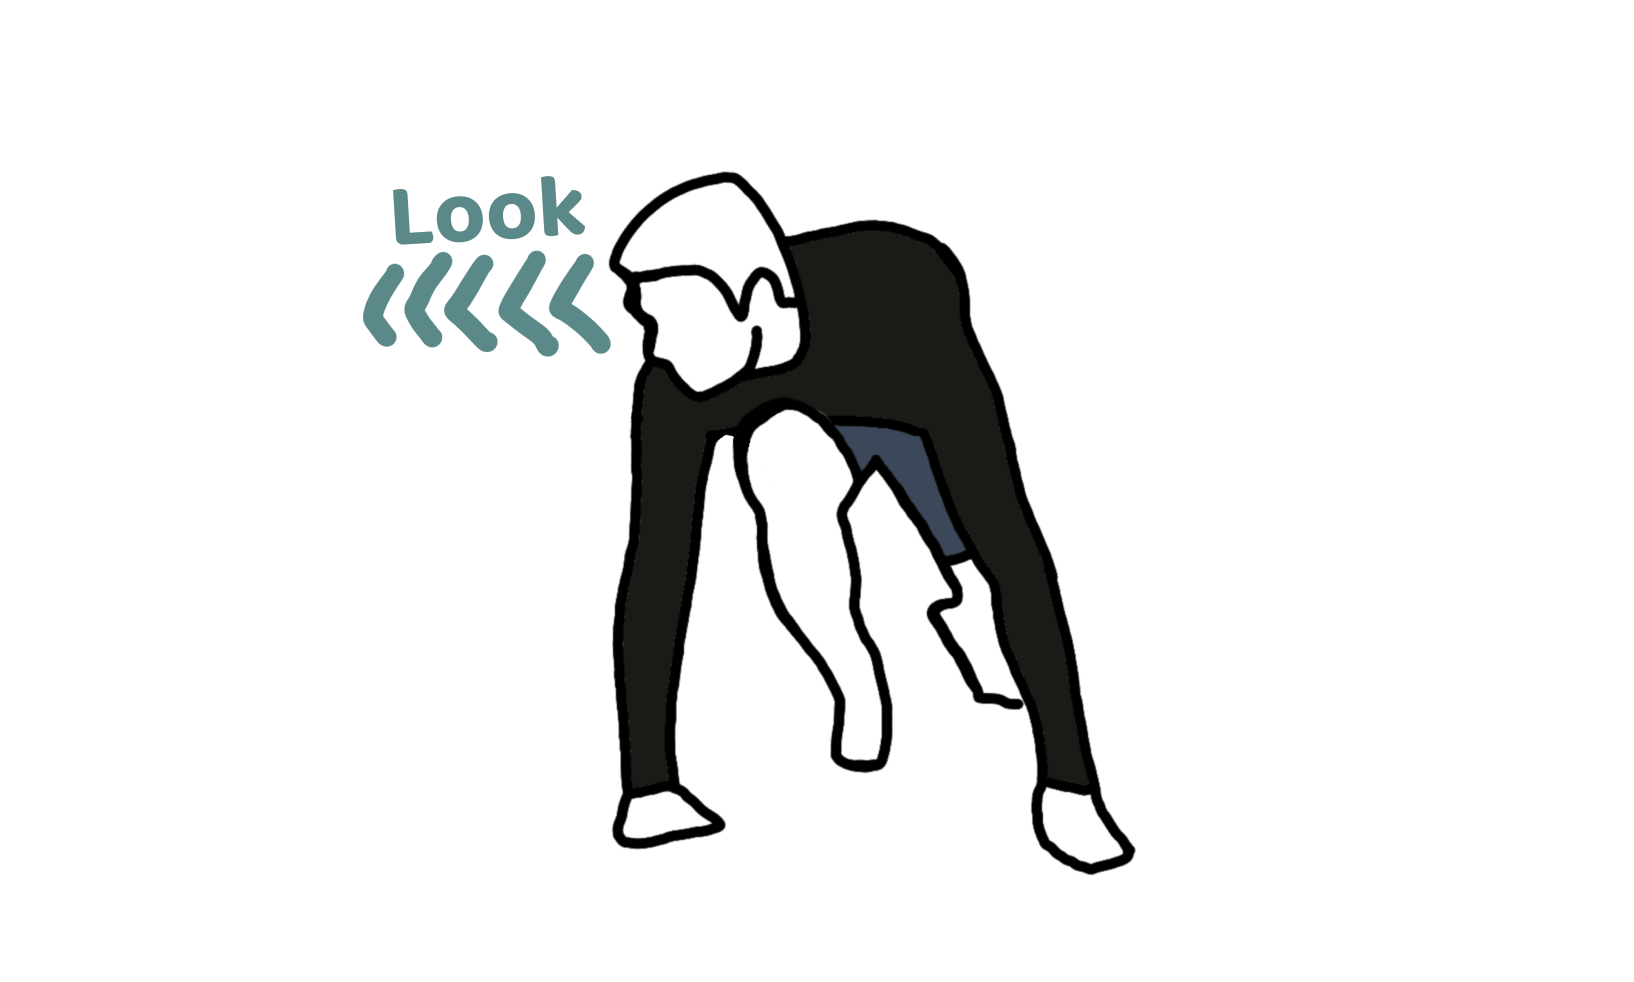
#2. Looking & Leaning

There really is no better feeling than gliding along the face of a wave. Once you’ve experienced it, there’s no going back. Surfing becomes more fun, more addictive and more enjoyable each session. If you are confident you have positioned yourself correctly, you can now begin the second step. This starts by paddling whilst looking and leaning your upper body towards either the left or right. You will start to feel your direction begin to change. This is often done during the last 3 paddle strokes.
Only once you are certain you are on the wave, paddle in the direction you want to go, angling either right or left. Look and lean towards the direction you’re going, and begin to turn the head and adjust the paddle strokes. This can be done simply by pulling water towards the inside rail, and pushing water away from the outside rail. Our advice; don’t overthink it! This usually comes naturally to students. When you look towards your target, you generally don’t think about changing your paddling. More often than not, you will just do it unconsciously.
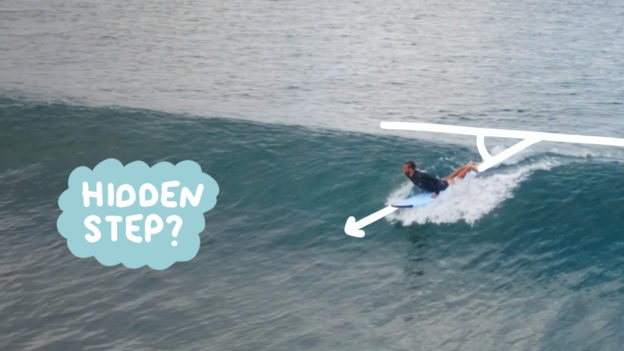
#3. Cobra Pose & Inside Rail Engagement
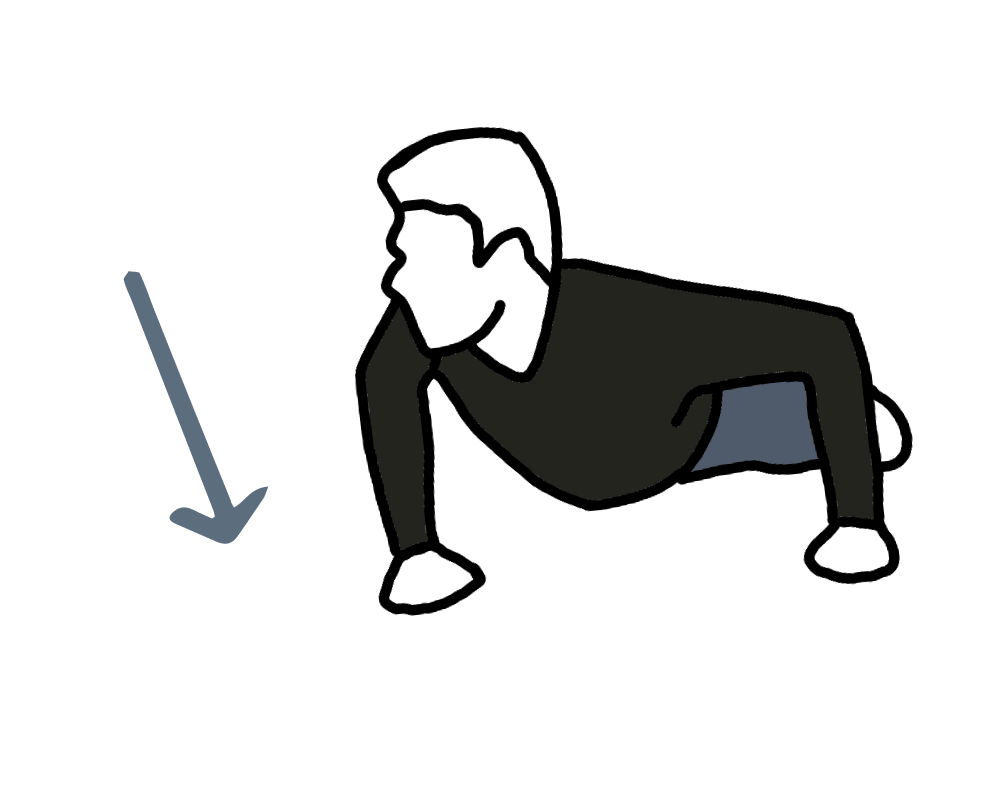
The Cobra Pose, also known as the “hidden step,” is the core to angling our take off. It prevents us from nose diving, creates easier maneuverability of the board and sets us up for our take off.
Once you’ve caught the wave, place both hands on the deck beneath the pectorals and lift the upper body up into the cobra pose position. Pointing the head and chest towards the direction you want to go, lean towards that direction while you are in the cobra pose position.
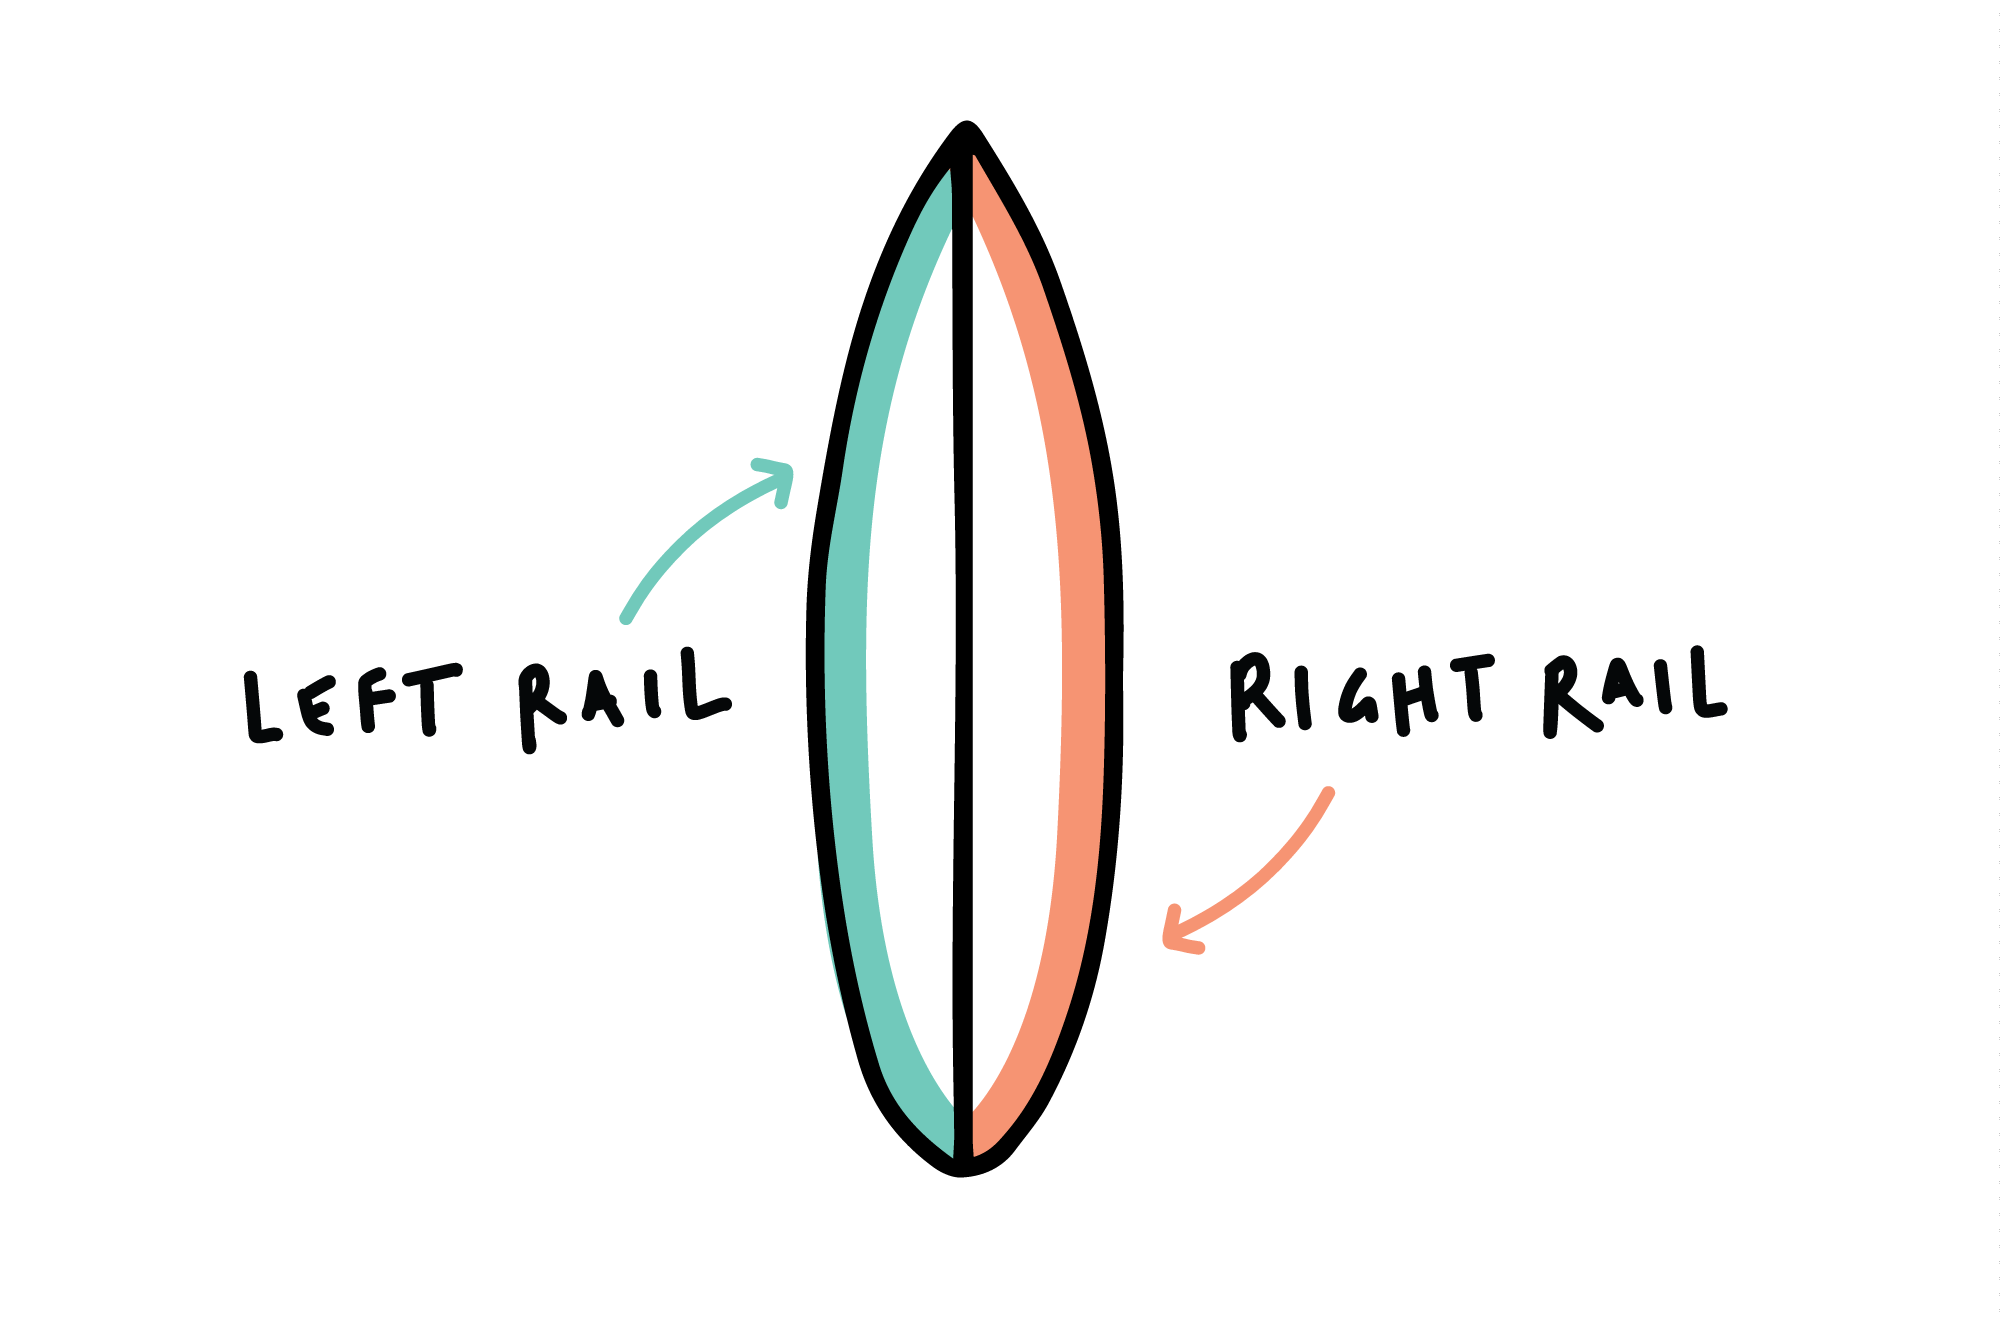
We then want to start by putting extra weight on the hand that’s over the inside rail. As surfers lean in the cobra pose, what they are actually doing is engaging the inside rail and putting the board in a trimming position, as the rail is set underwater. For example, if you want to go left, you should use your left hand to slightly push down the left rail into the water. This will help give your surfboard direction and momentum to go left before you pop up.
The last stage of the Cobra Pose step is what we call the “Cobra Pose Lean”. It is the final step before we begin our pop up. This is basically leaning in the cobra pose for fractions of seconds or a few seconds just before you pop up. Why? This hidden step of leaning more for a short period of time right before we take off increases our angle, and applies pressure to engage more of our inside rail.
#4. Take Off: Head & Chest towards Target
Last but not least, the take off. For many beginners and intermediates, it can be at this slight moment when things go wrong. It could be something as simple as your chest not pointing in the same direction, making or breaking whether you will pass the section or not. Remember, small adjustments = a big difference. Keeping our head and chest towards the target, we must always remember to keep our upper body pointing in the direction we want to go. Why? So we can keep the same line and same inside rail engagement once up on our feet. It’s all about being in the right place at the right time. To conclude, you will only be successful angling your take off if you are consistently landing on your feet in the proper position for where you need to go on the wave.
Why Angle The Take Off?


- It’s easier for surfers to draw their line on the shoulder.
Fun fact- when surfers angle their take off, they actually ride the wave on their chest towards the right or left for a short time. It is whilst on their chest that surfers draw and follow the line they will take. Changing direction is not necessary. - It helps to surf fast peeling waves.
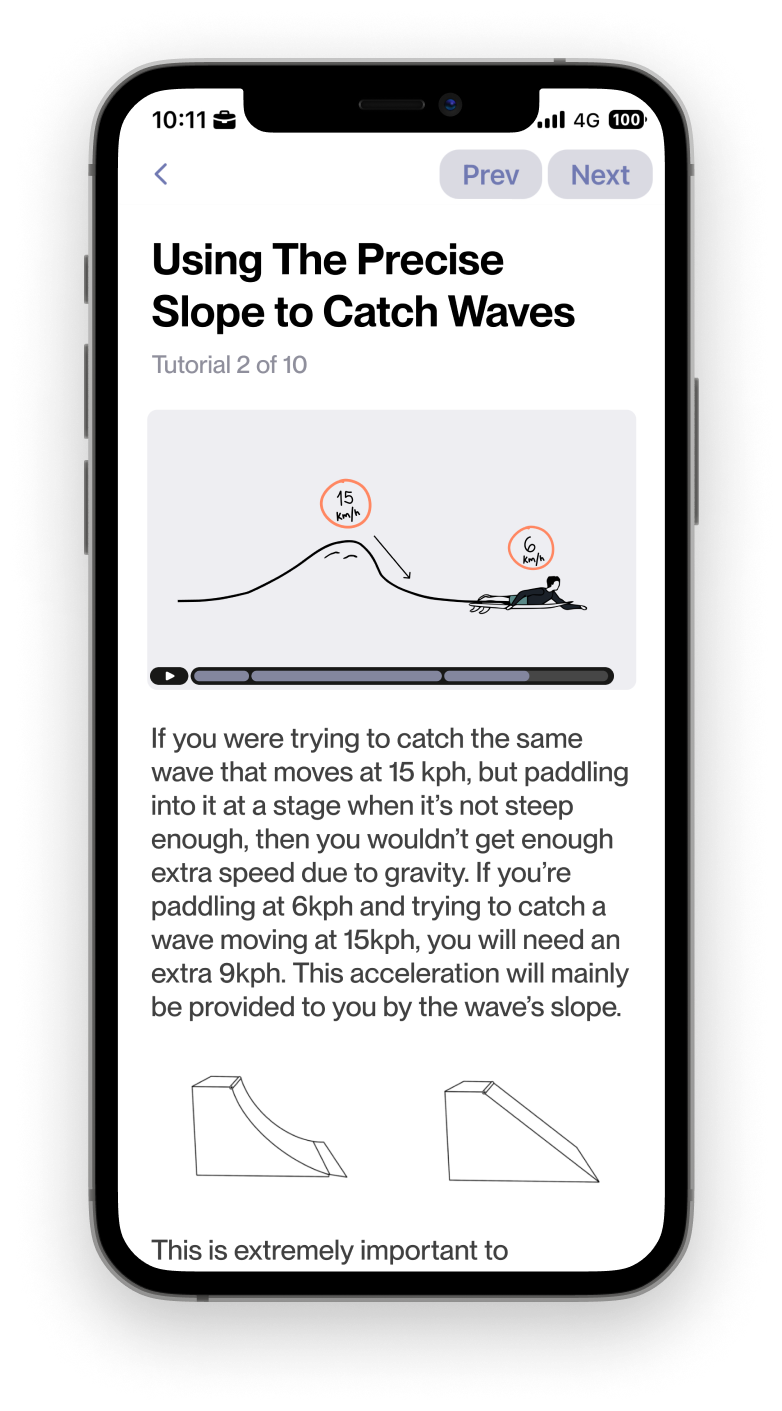
Different waves and breaks require different angles. We have to adjust our angle to match the speed of the wave itself. With the proper technique, angling your take off will become extremely useful in certain types of conditions. For example, fast peeling waves give surfers less time to drop straight down the wave and come back up. They need to generate speed and angle towards the right or left as soon as possible to make the section. Without a proper angling technique, these waves would not be makeable. - Prevents Nose Dives.
Nose diving! We’ve all been there. If you’re someone that finds yourself consistently in this position, this may be your calling. Although nose diving can be contributed by other factors, it is a great tool to indicate whether you’re angling your take off correctly or not. In summary, no angle= no space for the surfboard to fit on the waves shape. Taking off without an angle can often result in the nose going underwater, compared to if it was diagonal. - More Time.
Whilst the end goal is to quickly pop up in the proper stance, angling the take off gives us slightly more time to get to our feet. This is because you’re already angled and riding the shoulder with the same line you’d be taking if you were standing on your board, so popping up in an instant isn’t always necessary. This is great if you’re someone with a slower take off technique, or feel that you often need to readjust your stance. - More Speed.
Angling your take off plays a huge role in generating speed towards the left or right. Basically, surfers gain speed when trimming down the line because water hits the bottom of their board and gets redirected towards the tail. Believe it or not, the same physics apply when surfers are laying down on their chest, angling their take off. They are still technically trimming, by staying higher on the waves face and engaging more of the inside rail. This provides extra momentum towards the direction in which they want to go. It’s a win-win situation for all. - Setting Up Your First Maneuver.
Finally, don’t forget…
Small angle adjustments= a huge difference. In order to set yourself up for your first solid manoeuvre, a proper angle technique is a requirement. Your angle is the start point of your ride. It decides what section you get to surf, how many maneuvers you can complete and how you can make the most of what a wave has to offer.
When Should a Surfer Angle Their Take Off?
A common question we are asked by surfers is “when should I start to angle my take off?”

“When” you decide to angle depends on the wave’s shape and how well you are positioned for it. There is really no other way to put it, other than a surfer must acquire basic wave reading skills in order to know when to angle. Generally speaking, we most commonly find that it is not necessarily the angling technique itself that lets surfers down, but how they positioned themselves in the first place. To put it simply, you must be able to read and anticipate how waves will break and peel in order to know when and where to begin angling your take off.
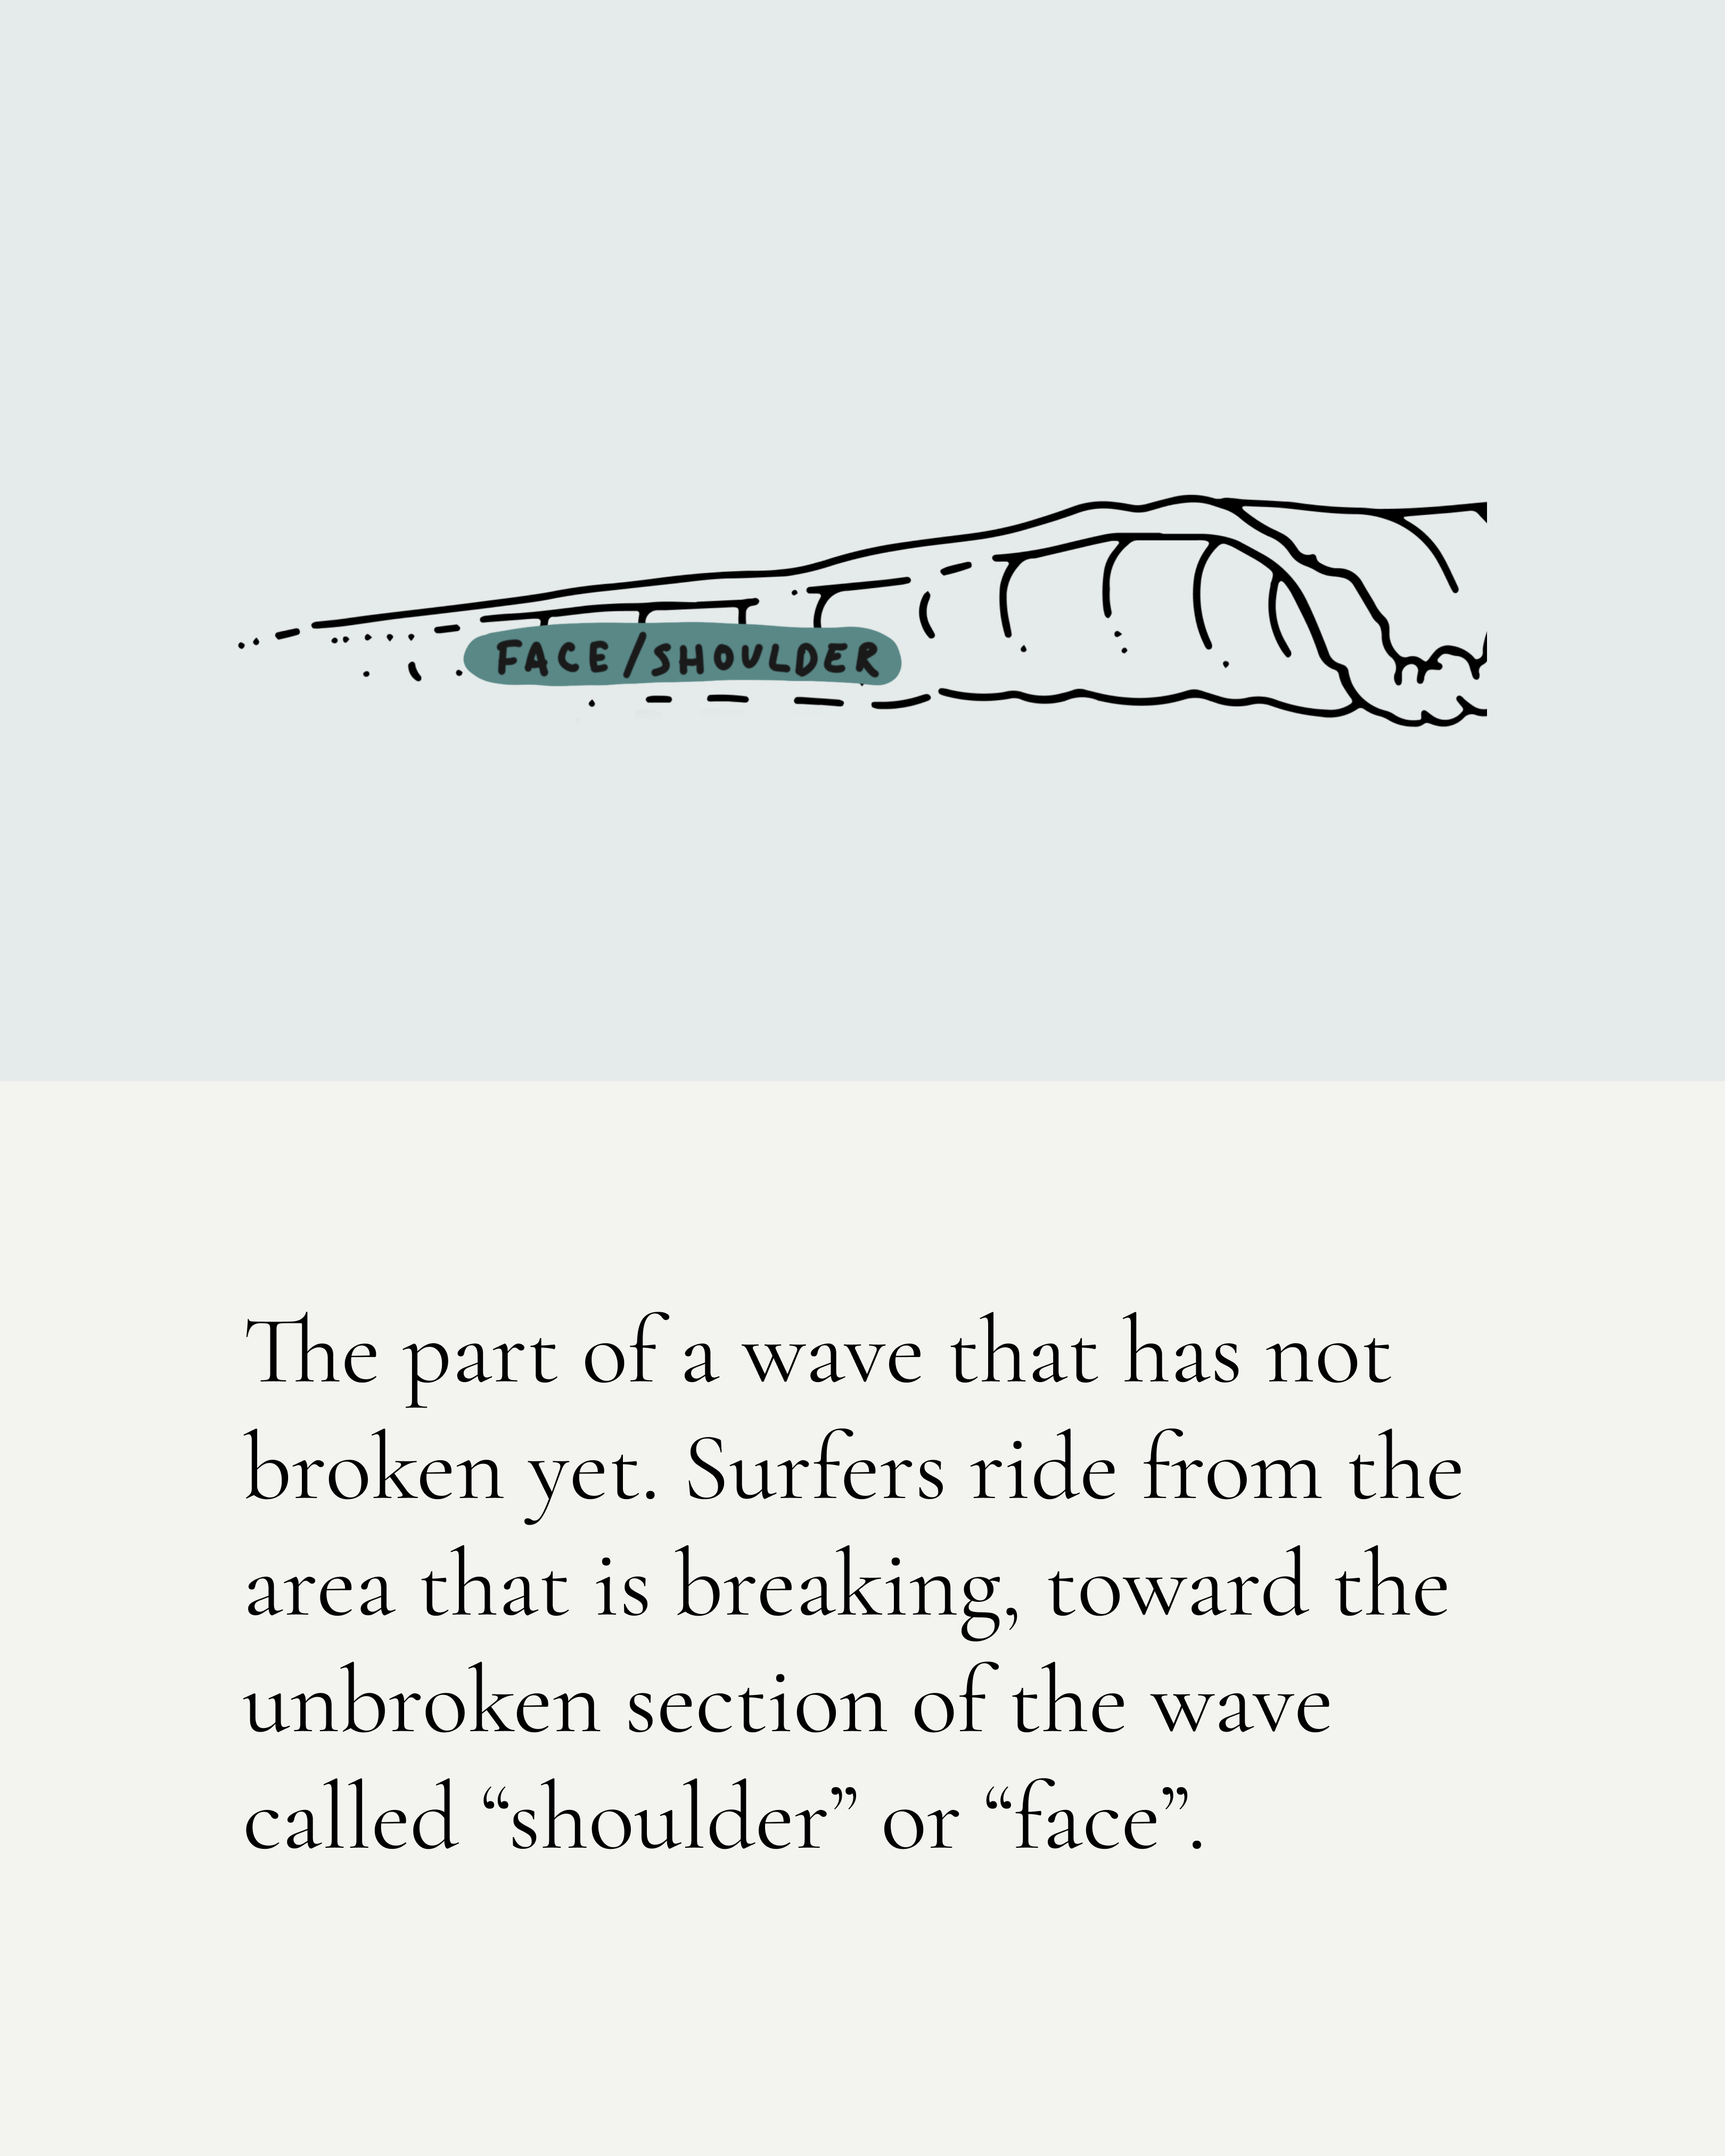
So where do I start? The first step is identifying a peak and a shoulder that has a downward slope. You can then predict where the wave will first break, where the peak is and what direction it will peel. Only angle your take off at the very last seconds when you are certain that you’re on the wave, during your last three paddle strokes (as seen in step #1 & #2 above).
One thing to remember is that the ocean is an environment that is susceptible to change, meaning that no one wave is the same. It’s important to note that your timing and angle will differ from one wave to another. Depending on elements like paddling skills, positioning, wave shape and board size, surfers will match the wave’s speed and proceed to angle their take off slightly differently on each wave. We are constantly adjusting our position and angle.
Tip: Check out our “Reading Waves” and “Catch Unbroken Waves” courses to help complement your practice.
How much should I Angle?
We adjust our level of angle according to how the wave will break.
Angling takes time and can be a lot of trial and error. Knowing what level of angle to take all comes down to having the basic ability to anticipate if a wave will peel left or right, identify the peak, analyse the shoulder line and predict the peeling speed. Only then can we understand what level of angle to take. So what does this mean? If a wave has a higher shoulder line, you will need to angle more. If it has a lower shoulder line, you will need to angle less.
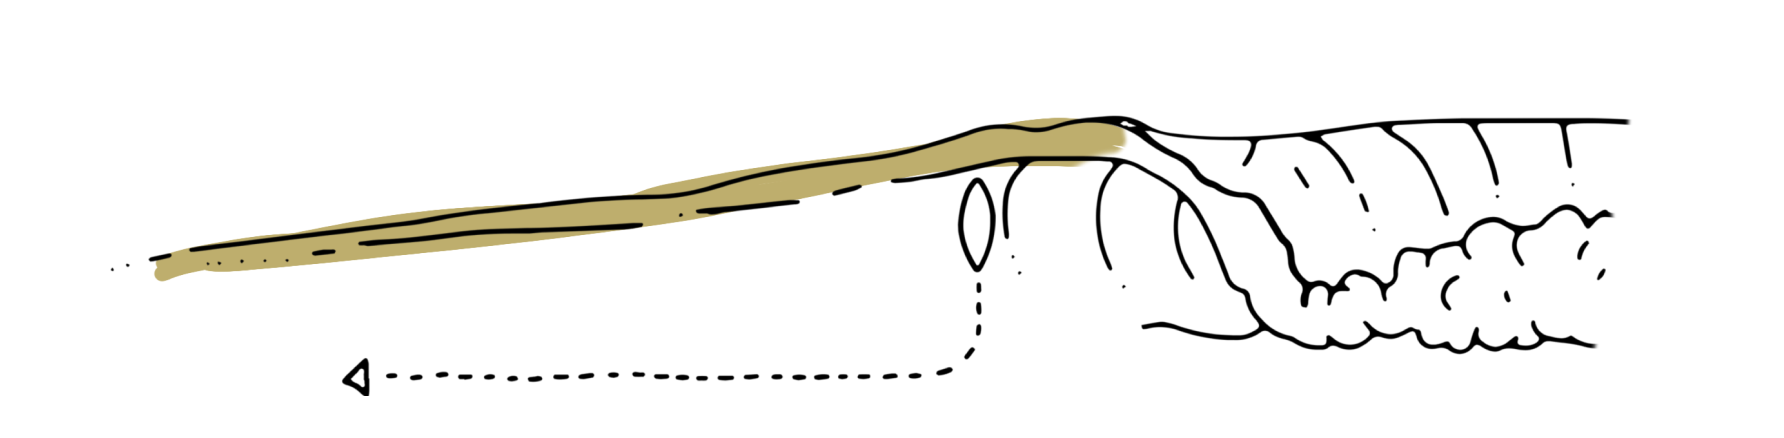
High Shoulder Line = More Angle
High shoulder line= faster-breaking wave.
A straighter shoulder line requires more angle.
A steeper wave gives surfers less time to drop lower to the bottom. Surfers will have to paddle with a stronger angle into waves with a higher shoulder line so they can stay high, make the section, and gain speed toward the left or right.
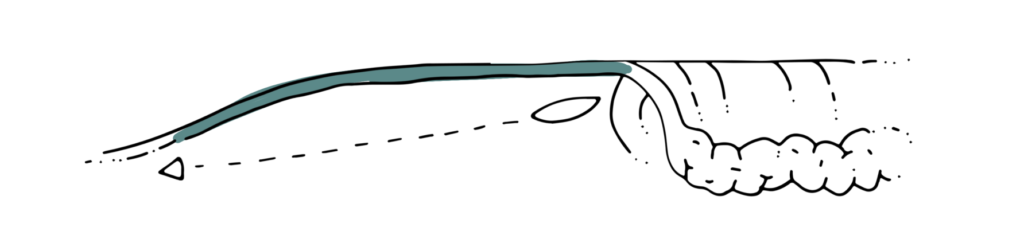
Low Shoulder Line = Less Angle
Low shoulder line= slower breaking wave.
A downward slope shoulder line requires less angle. The wave will break slower. Surfers will either paddle perpendicular to the wave, or with a very slight angle. With more time, surfers can then ride the wave towards the bottom, burning speed and allowing the shoulder to build up into a more enjoyable shape.
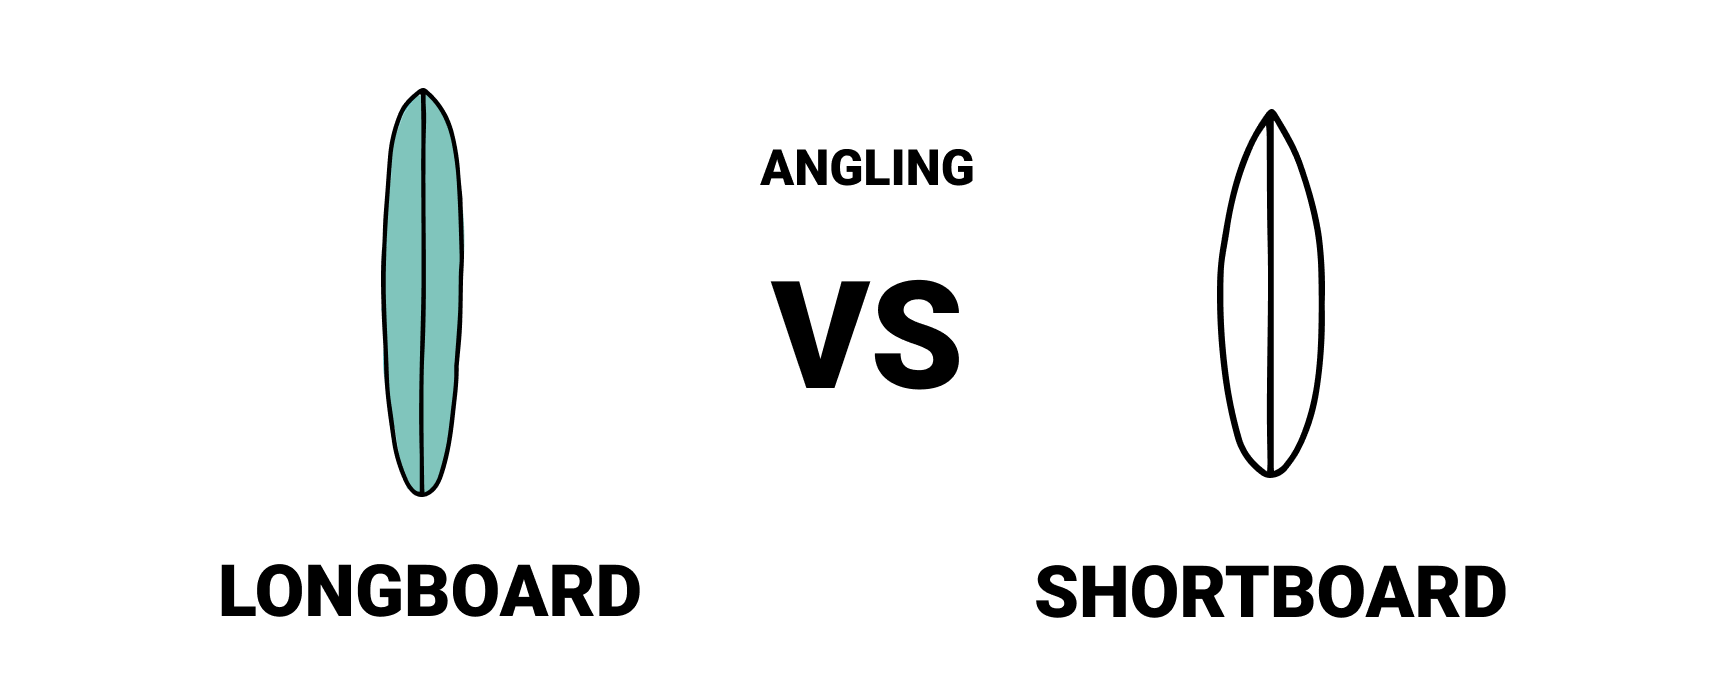
Longboard Vs Shortboard: Differences for Angling
What’s the difference?
Well, it’s no surprise that the equipment we choose to ride is going to drastically affect how we can (or can’t) angle our take-off. Longboards and shortboards respond very differently. It’s crucial we understand the significant differences between the two pieces of equipment in relation to angling our take off, and adjusting our technique accordingly. Some key aspects to take into account include: Paddle speed, Nose dives, Peak positioning and Manoeuvrability.
- Faster Paddle Power.
Extra paddle speed= earlier angle. Longboarders have more rail engagement and are much easier to catch waves on, meaning surfers are often able to start paddling at an angle sooner. It gives them more time to lean in cobra pose, read the shoulder and decide what line to draw. - Nose Dives.
Longboards= less rocker. Because of their length and low rocker, it is easier to nose dive at the takeoff. Without a proper angle in their take off, surfers on a longboard are prone to nose dives. - Peak Positioning
Longboards= possibility to take off further from the peak. With higher paddle speed on a longboard, surfers can catch waves even far on the soft shoulder, away from the peak. Result? Longboarders can ride the wave straight to the bottom, or even angle their take off in the opposite direction of where they are going to surf. - Manoeuvrability
Longboards= less maneuverability. Why? Longboards have long, straight rail lines. The bigger the board, the harder it is to move it around. Angling has to be more exaggerated.
- Slower Paddle Power.
Slower paddle speed= later angle. Shortboarders generally need to paddle perpendicular to the wave to make sure they catch it, angling during the last few paddle strokes. - Nose Dives.
Shortboards= more rocker, so in theory, less potential to nose dive. Paddling into steeper waves still brings the possibility of nose diving, therefore shortboarders will also often need to angle their take offs in those conditions. - Peak Positioning
Shortboard= must take off at the peak. On a shortboard, you can’t catch waves further on the shoulder. Shortboarders must take off at the peak, or else they will miss the wave or take off in the wrong section. - Manoeuvrability
Shortboards= more maneuverability. Why? Shortboards have shorter and usually curvier rail lines, making it easier to maneuver without having to apply too much weight.

Angling: Common Mistakes
Angling your take off is all about trial and error. It takes time, practice and patience, and isn’t a skill you simply learn overnight.
- Incorrect Positioning
The single most common mistake we find among students when angling their take off is incorrect positioning. This is when a surfer misreads how the wave will peel, ending up with the wrong peak position. An example of this is when a surfer is positioned too deep. No matter when they angle and how much angle they take, they are not in the correct spot to begin with, and will therefore not be successful in catching or keeping up with the wave. - Not Angling Enough, or angling too much
Stronger, faster-breaking waves= more angle.
Softer, slower-breaking waves= less angle.
Surfers need a stronger angle towards the shoulder on fast-breaking waves. A common mistake is students not angling enough, unable to keep up with the speed of the wave, and getting caught in the whitewater. On the other hand, we commonly find some surfers angling too much on softer, slower breaking waves. As a result, they miss the wave and go over the shoulder, riding over the back of the wave. - Angling Frontside instead of Backside
Naturally, when surfers first learn to angle their take offs, they tend to angle themselves to ride the wave frontside because it feels easier to surf when they face the wave. The ocean dictates if the wave will peel towards the left or the right, so you need to practise angling towards both sides. - Angling Too Soon or too late
It’s all about being in the right place at the right time. The more and the sooner you angle your take off, the harder it is to catch the wave. Angle your take off too early and you will either position yourself too far on the shoulder or miss the wave. The opposite timing mistake is to try to angle the take off too late without having done at least a few paddle strokes towards the right or left, automatically putting you in the wrong position. - Not keeping the Head & Chest pointing towards Target
Among both beginners and intermediates, a common mistake is when students stop looking towards the target or turn their chest back towards the bottom, even for just a fraction of a second. Always keep your head and chest pointing in the direction you want to go. Your Post Take Off Position means you need to keep the line you drew when you started to angle your take off. This keeps your inside rail engaged, projecting you with forward momentum towards the desired direction you would like to go.
Quick Tips
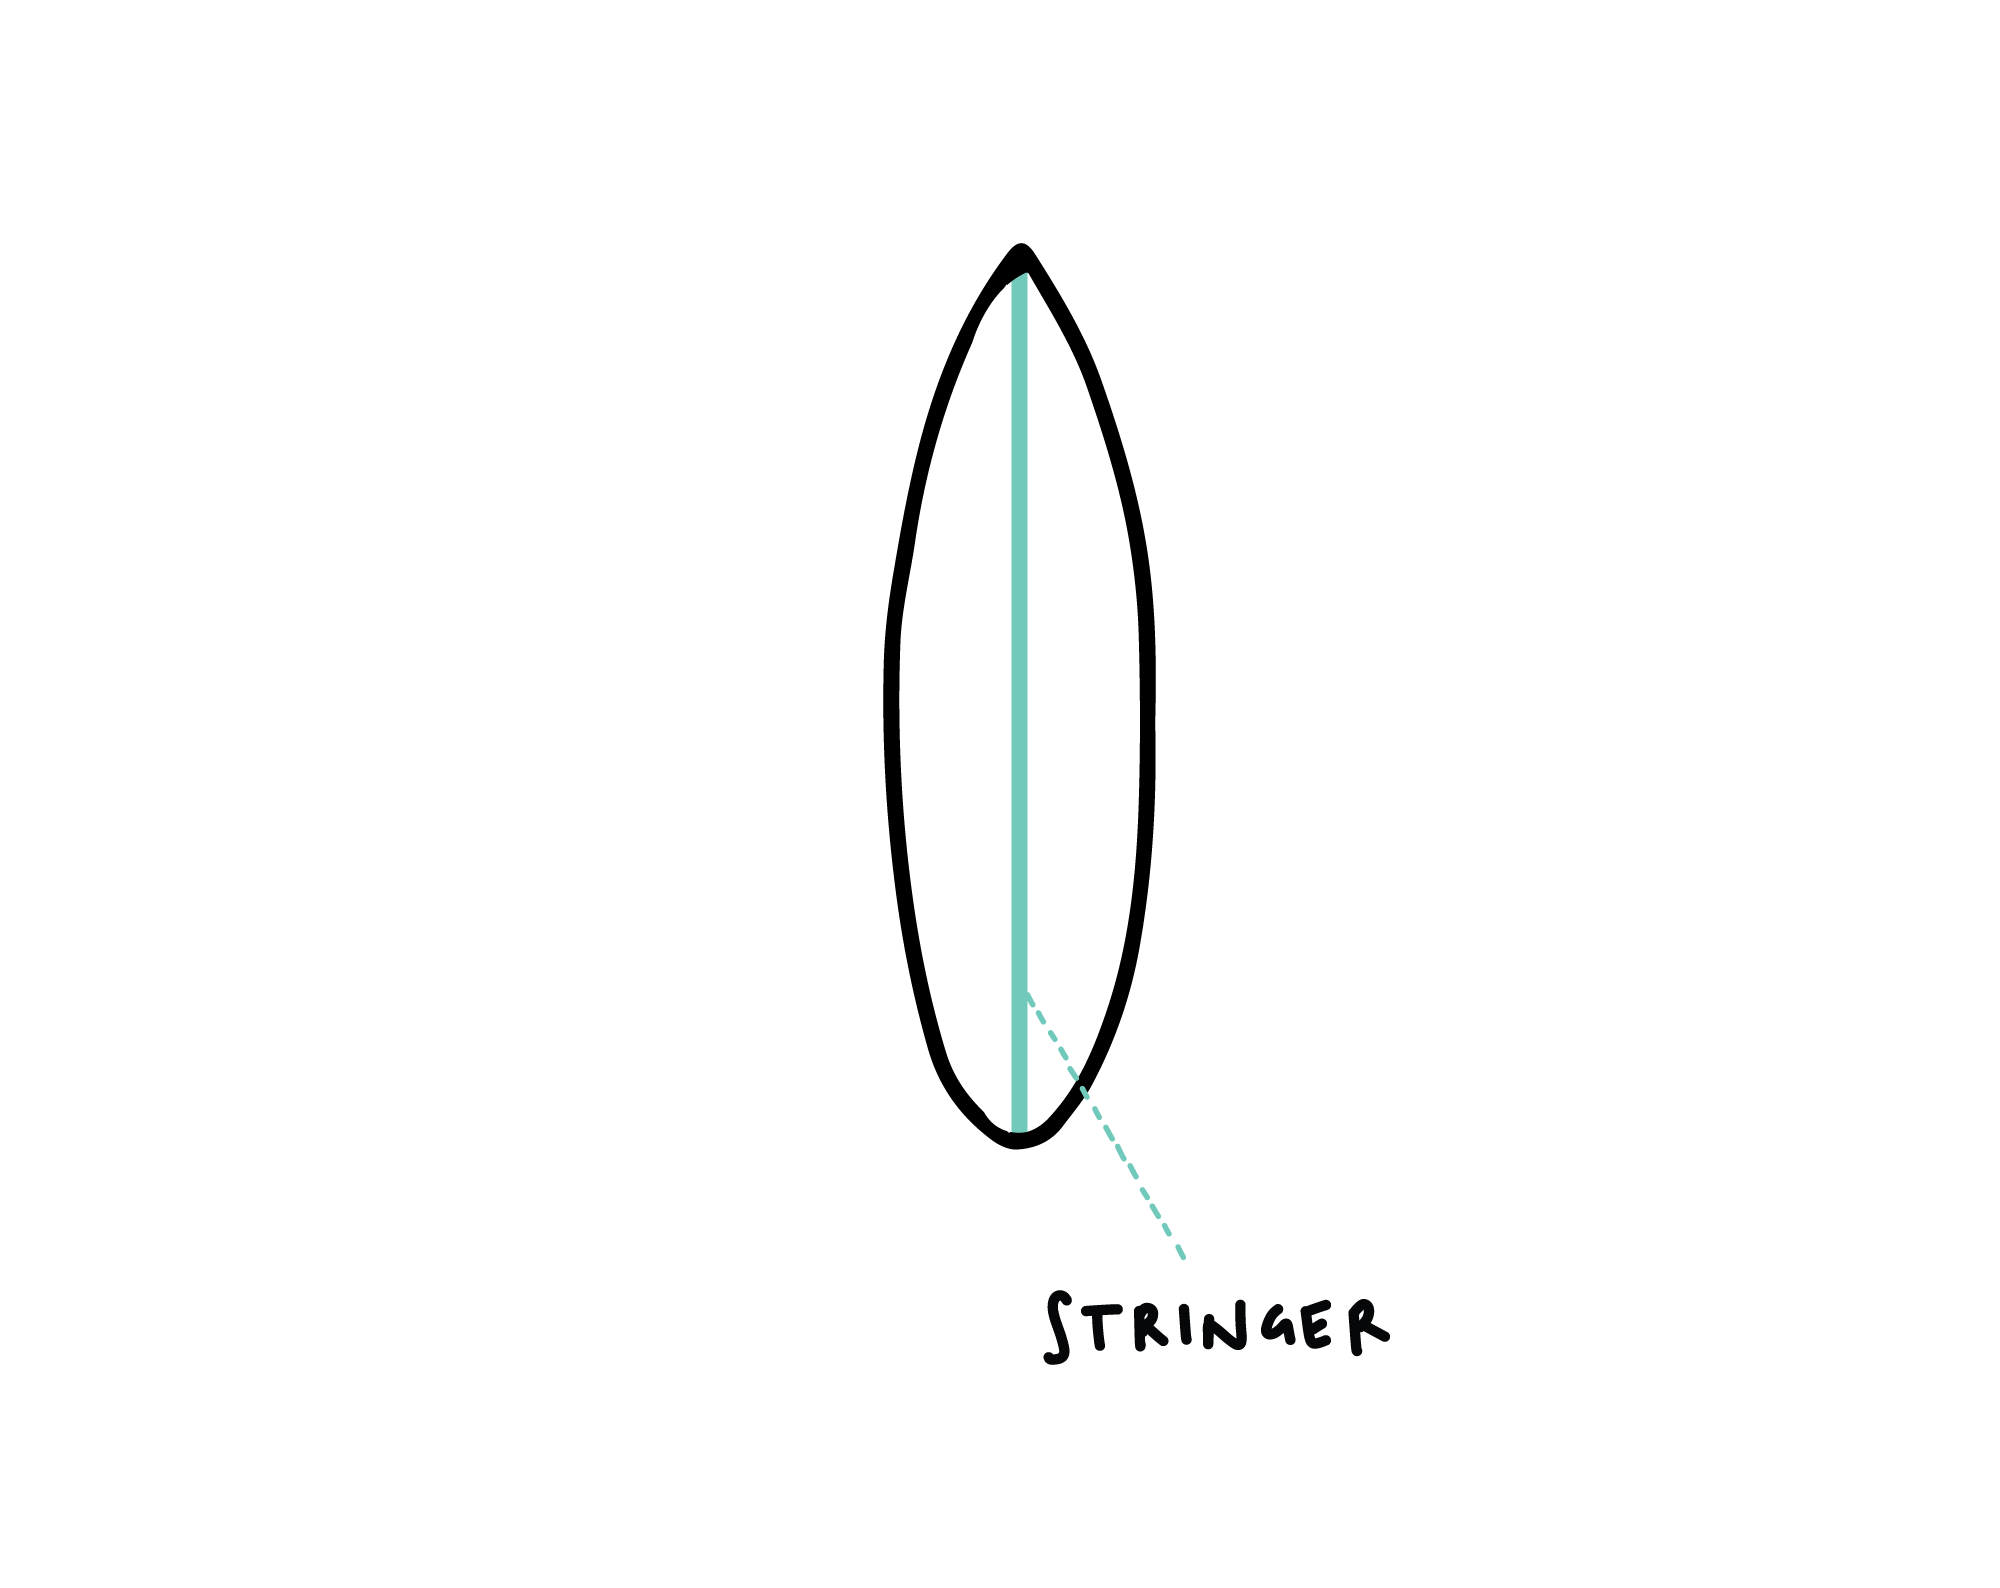
- Check your feet positioning Your feet should be perfectly positioned on the width of the surfboard, with your arches straight over the surfboard’s stringer. Bad feet positioning can make it very difficult to keep your line as you go down the wave, as you won’t be able to apply the proper weight on to the rails with your toes or heels.
- Don’t go frontside on a wave when you should be surfing it backside. It is usually easier for a novice surfer to ride a wave “frontside”. Surfing “frontside” means you face the wave with your chest as you follow the wave. This is usually easier than surfing backside: with your back facing the wave. A common mistake is to surf towards the whitewater, instead of towards the open face of the wave, for the simple reason of being more comfortable riding frontside. The ocean dictates whether a wave peels to the right or to the left, so practise both frontside and backside riding!
- If your chest is pointing to the direction you want to go, then you’re probably doing it right and it will be easier to surf right or left on the face.
- Planning to go down the “middle” of the height of the shoulder is only an indicator. In reality, you will want to draw your line a bit higher than the middle if the wave’s shoulder is breaking fast, and a bit lower when it’s breaking slowly.
- You might be surfing lower on the face than you think you are. Take note that most beginners think they are surfing higher on the wave than they actually are. The ideal is to see yourself surfing on pictures and video to verify where you draw your lines.


